How to install Wireshark on an Ubuntu KVM
Created by Admin at 15-05-2020 11:32:34 +0200Wireshark is a powerful network analysis tool used to capture packets and display them in real-time. The tool allows you to analyze your network's traffic flow by filtering- and inspecting individual packets to sniff out any suspicious activity. In this tutorial I'll be going over how to install Wireshark, formerly Ethereal, step by step.
For this tutorial we're going to need an KVM running Ubuntu. We'll be running 18.04 but for other versions the installation process should be similar. You can easily get a KVM running Ubuntu on the cloudcontainers.net website. Note that running a standard cloud container (using lx) will not work with Wireshark.
Let's first add Wireshark's PPA to the package manager, your package manager might already contain Wireshark, to get the most recent version however, use the PPA:
sudo add-apt-repository ppa:wireshark-dev/stable |
Now we've added a new source for Wireshark, let's update our packages:
sudo apt update && sudo apt upgrade -y |
We are now ready to install Wireshark:
sudo apt install wireshark -y |
You'll be prompted as to whether you want to let Wireshark capture packets as root, or want to allow non-superusers to capture packets as well. we're going to disallow non-superusers, so only user with sudo privileges can run packet captures.

Next, we'll have to disable Lua in order to shutdown a message concerning the fact we're running captures as a superuser.
sudo nano /usr/share/wireshark/init.lua |
Set the first entry, disable_lua, from false to true. Like this:

You can now run Wireshark:
Note you must run as a super-user for you to be able to capture packets.
sudo wireshark |
Wireshark should now open:
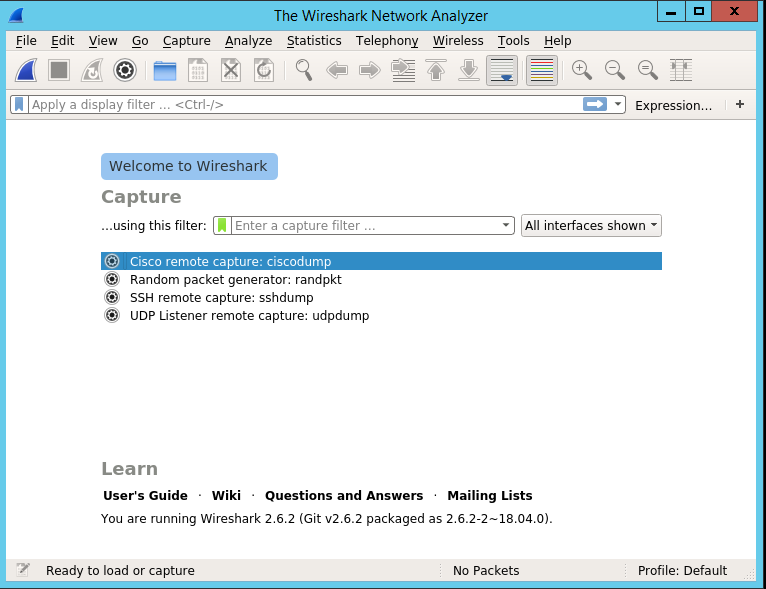
You can now directly start capturing network traffic by clicking the shark icon in the top-left corner.
Congratulations, you've just installed Wireshark on an Ubuntu KVM!
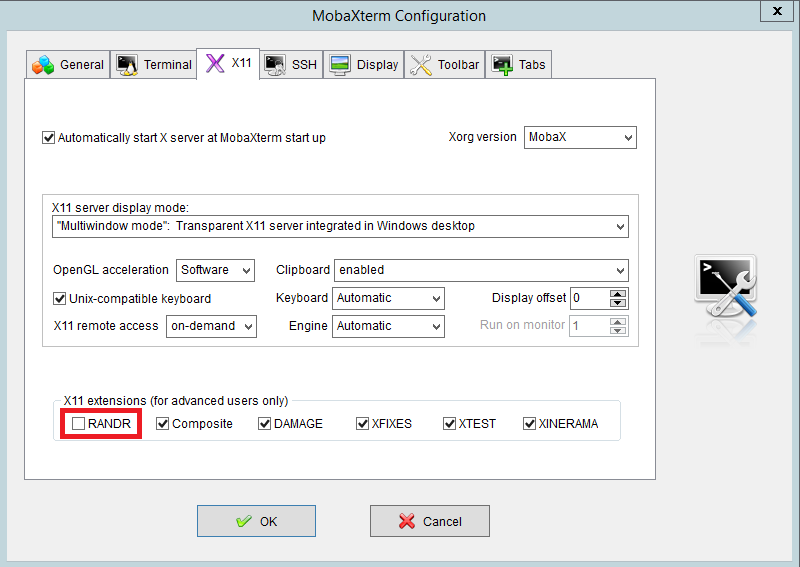
MobaXterm users might experience the following error: Main Warn QXcbConnection: XCB error: 145 (Unknown), sequence: 171, resource id: 0, major code: 139 (Unknown), minor code: 20
This is quickly solved by disabling one of Moba's, by default activated, X11 extensions: RANDR.
Go to Settings > X11 and disable RANDR:

Comments are turned off.