How to set up Snort on an Ubuntu container
Created by Admin at 08-04-2020 11:39:45 +0200Snort is an open source network intrusion detection system, built in 1998. It's capable of real-time traffic analysis and is used to detect a variety of attacks. In this guide we'll go over how to install Snort step by step as well a script that automates new rule package downloads and a package that will help writing all events to a (local) database.
Before we start, we need a Linux Ubuntu installation. We'll skip that step in this tutorial since you can easily get a default linux installation on one of the containers on the www.cloudcontainers.net site.
This tutorial is based on the cloud containers created on the my.cloudcontainers.net page. This means that you are by default the root user, so all of the commands below don't make use of sudo. If however, you're not the root user on your system, you'll have to add "sudo" in front of the commands found in the guide below.
Preparation
It's always good practice to start off by updating our current packages:
apt update && apt upgrade -y |
Let's install Snort's dependencies first:
apt install build-essential bison flex libpcap-dev libpcre3 libpcre3-dev libdumbnet-dev zlib1g-dev libnghttp2-dev openssl libdnet apache2 libapache2-mod-php libphp-adodb php-pear libwww-perl php-gd -y |
Installation
Since Ubuntu's default package manager doesn't contain Snort, we'll have to download it from the source:
wget https://snort.org/downloads/snort/daq-2.0.6.tar.gz wget https://snort.org/downloads/snort/snort-2.9.11.1.tar.gz |
Now we've downloaded the packages, we can unpack them.
tar xvzf daq-2.0.6.tar.gz && tar xvzf snort-2.9.11.1.tar.gz |
In order to save disc space, you could remove the tar.gz files now:
rm daq-2.0.6.tar.gz snort-2.9.11.1.tar.gz |
Let us first move into the daq folder and install the package:
cd daq-2.0.6/ ./configure && make && make install |
Now move into the other package's directory and install that one:
cd ~/snort-2.9.11.1 ./configure --enable-sourcefire && make && make install |
Importing rules
Good, now that we've installed Snort we'll need to create the correct directory structure since this doesn't come along with the installation.
Execute the following command to create three new directories:
mkdir -p /etc/snort/rules /var/log/snort /usr/local/lib/snort_dynamicrules |
Create new files for the white and blacklists as well as the local rules.
touch /etc/snort/rules/white_list.rules touch /etc/snort/rules/black_list.rules touch /etc/snort/rules/local.rules mkdir /etc/snort/rules/iplists touch /etc/snort/rules/iplists/default.blacklist |
Then, we copy the files from the extracted package into the directory structure we've just created:
cp ~/snort-2.9.11.1/etc/*.conf* /etc/snort && cp ~/snort-2.9.11.1/etc/*.map /etc/snort |
Next, you'll have to choose what rule package you want to download for Snort. You can either download the community package, for which you don't need a Snort account (and oinkcode); Or download the registered user rule packages, using your oinkcode. Another option would be to use PulledPork, a helper script that will automatically download the latest rules.
Option 1: PulledPork
If you want to automate rule package downloads, we can install a helper script called PulledPork that will do the (future) configuration for us.
Let's first install PulledPork's pre-requisites:
apt install -y libcrypt-ssleay-perl liblwp-useragent-determined-perl |
Download and unpack PulledPork:
wget https://github.com/shirkdog/pulledpork/archive/master.tar.gz -O pulledpork-master.tar.gz tar xzvf pulledpork-master.tar.gz && rm pulledpork-master.tar.gz |
Next, we copy the PulledPork.pl file to /usr/local/bin and make the file executable:
cp ~/pulledpork-master/pulledpork.pl /usr/local/bin && chmod +x /usr/local/bin/pulledpork.pl |
We can test to see if PulledPork works by checking its version:
/usr/local/bin/pulledpork.pl -V |

Copy the necessary PulledPork config files to your Snort directory:
cp ~/pulledpork-master/etc/*.conf /etc/snort |
Open up the PulledPork config file:
nano /etc/snort/pulledpork.conf |
We'll have to edit quite a few things in here.
- Replace with your Oinkcode
- You can find your Oinkcode on your Snort's user account settings page. If you don't have an account, make one, or comment the line out. However, for the most complete installation I recommend you register.
- Set the
rule_pathto /etc/snort/rules/snort.rules - Set the
local_rulespath to /etc/snort/rules/local.rules - Set the
sid_msgpath to /etc/snort/sid-msg.map - Change the
sid_msg_versionto 2 - Set the
config_pathto /etc/snort/snort.conf - Change the
distroto your Linux distribution, choose one that comes closest to your distribution. If ubuntu-16-04 isn't present, take ubuntu-12-04 - Set the
black_listpath to /etc/snort/rules/iplists/black_list.rules - Set the
IPRVersionpath to /etc/snort/rules/iplists
Save and close the file.
Next, we are going to run PulledPork manually to check everything works correctly. Use the following command:
/usr/local/bin/pulledpork.pl -c /etc/snort/pulledpork.conf -l |
Next, we go into Snort's configuration file to include the newly, by PulledPork, imported rules to the package.
nano /etc/snort/snort.conf |
Below the local.rules at step 7, add the following line:
include $RULE_PATH/snort.rules |
Option 2: Registered user rule packages
For this rule package you'll need to register at Snort's website. Here you'll get your "Oinkcode", which will allow you to download the package. Go to snort.org to register an find the correct rule package for your Snort version at step 3.
You can find your Oinkcode on your Snort account settings page.
Download the package using the following command:
Note that your version is probably different and you'll still have to fill in your Oinkcode.
wget https://www.snort.org/rules/snortrules-snapshot-29111.tar.gz?oinkcode=your_oink_code_here -O snortrules-snapshot-29111.tar.gz |
Unpack the package into the Snort directory:
tar -xvzf snortrules-snapshot-29111.tar.gz -C /etc/snort |
Option 3: Community package
If you choose to go for the community package, you can download it using the following command:
wget https://www.snort.org/downloads/community/community-rules.tar.gz -O community-rules.tar.gz |
Unpack it to Snort's rule folder:
tar -xvzf community-rules.tar.gz && cp ~/community-rules/* /etc/snort/rules |
Configuration
With all files we need in place, we can start configurating. Open the snort.conf file. In this guide I'll be using nano, but you can use whichever you prefer.
nano /etc/snort/snort.conf |
We'll have to edit quite a few things here, find the correct section and edit it to reflect what I've done:
# Setup the network addresses you are protecting ipvar HOME_NET public_server_IP |
# Set up the external network addresses. Leave as "any" in most situations ipvar EXTERNAL_NET !$HOME_NET |
# Path to your rules files (this can be a relative path) var RULE_PATH /etc/snort/rules var SO_RULE_PATH /etc/snort/so_rules var PREPROC_RULE_PATH /etc/snort/preproc_rules |
# Set the absolute path appropriately var WHITE_LIST_PATH /etc/snort/rules var BLACK_LIST_PATH /etc/snort/rules |
Scrolling down to step #6, we'll need to uncomment this line:
output unified2: filename snort.log, limit 128 |
Lastly, near the bottom of the config file you'll find a list of rule set inclusions. Only if you want to use any custom rules, uncomment the local.rules line:
include $RULE_PATH/local.rules |
If you chose to use the community rules, you'll need to include that as well. Add the following line to the list of inclusions:
include $RULE_PATH/community.rules |
Also, comment out any rule set inclusion you're not using.
In case you configured PulledPork, all rules are combined into the single /etc/snort/rules/snort.rules file, so you'll have to comment out all includes rules. There can be a lot of packages to exclude (by commenting out the inclusions) so it's easiest to copy a "#" sign and paste it along all those lines. Good luck!
Save and exit the file.
We can now finalize and validate our configurations using the following commands:
ldconfig snort -T -c /etc/snort/snort.conf |
If the test doesn't succeed it will tell you what the problem is.
If the test tells you it can't find the proper rules in the so_rules folder, try changing the SO_RULE_PATH to the regular rules folder by simply deleting "so_" from the path in the snort.conf file. Like this:
Commenting out these rules will make the test succeed as well, however, you won't be able to use these rules obviously.
var SO_RULE_PATH /etc/snort/rules |
Running snort
To run snort, simply typ snort in the command prompt. However, you probably want to run the program in the background so you can actually still use your server for other things. Therefor, we're going to create a snort.service that will allow us to run it as a daemon.
Create the snort.service:
nano /lib/systemd/system/snort.service |
Paste the following text into it:
[Unit] Description=Snort NIDS Daemon After=syslog.target network.target [Service] Type=simple ExecStart=/usr/local/bin/snort -c /etc/snort/snort.conf -i eth0 [Install] WantedBy=multi-user.target |
Save and exit the file.
Reload the systemctl daemon:
systemctl daemon-reload |
You can now start, stop and check Snort's status with the following commands respectively:
systemctl start snort systemctl stop snort systemctl status snort |
Use the following command to enable Snort to start on boot-time:
systemctl enable snort |
Congratulations, you've now set up and configured Snort!
Installing Barnyard2
Next, we'll install Barnyard and MySQL. We use Barnyard to parse Snort's unified binary files. Then, Barnyard will send this data to the MySQL database. First, we're going to install MySQL and set up a user account for Barnyard to use.
Before we install Barnyard, we'll first install its dependencies:
apt install mysql-server libmysqlclient-dev mysql-client autoconf libtool -y |
Next, we'll need to edit Snort's configuration file again in order to make it output events in binary, so Barnyard can process them.
Open Snort's config file:
nano /etc/snort/snort.conf |
Add the following line to the file:
output unified2: filename snort.u2, limit 128 |
We can now download Barnyard2:
wget https://github.com/firnsy/barnyard2/archive/master.tar.gz -O barnyard2-Master.tar.gz tar zxvf barnyard2-Master.tar.gz |
Navigate into Barnyard's folder:
cd barnyard2-master |
Barnyard expects a file from a pre-requisite library, we downloaded earlier, to have a different name than it actually has. We'll create a soft to prevent Barnyard from rising errors:
ln -s /usr/include/dumbnet.h /usr/include/dnet.h && ldconfig |
Tell Barnyard where it can find the MySQL directories:
Choose one of the following commands, depending whether your system is 32- or 64 bit respectively.
./configure --with-mysql --with-mysql-libraries=/usr/lib/i386-linux-gnu ./configure --with-mysql --with-mysql-libraries=/usr/lib/x86_64-linux-gnu |
Finish up the Barnyard installation:
make && make install |
We can test our installation by executing the following command:
/usr/local/bin/barnyard2 -V |
In order for Snort to use Barnyard, we're going to copy some files from the source package to the Snort directory:
cp barnyard2-master/etc/barnyard2.conf /etc/snort |
Next, we'll have to create a log directory for Barnyard, it won't use this, but the package will return an error without it.
mkdir /var/log/barnyard2 chown snort.snort /var/log/barnyard2 touch /var/log/snort/barnyard2.waldo |
Barnyard will save its alerts on a MySQL database, we'll need to create this database and also a new MySQL user.
First open up the MySQL terminal:
mysql -u root -p |
Create the database and user, choose your own preferred password in the fourth command:
create database snort; use snort; source ~/barnyard2-master/schemas/create_mysql CREATE USER 'snort'@'localhost' IDENTIFIED BY 'Snorts_MySQL_Pass'; grant create, insert, select, delete, update on snort.* to 'snort'@'localhost'; exit |
Now we have our database, we need to configure Barnyard to use it. We'll need to modify the Barnyard configuration file we just moved into the Snort directory:
nano /etc/snort/barnyard2.conf |
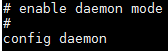
In order for Barnyard to be able to run as a background process, we need to edit the daemon section so #config daemon does not have a # any longer. When done it should look like this:
And add the following line to the bottom of the file:
output database: log, mysql, user=snort password=MYSQLSNORTPASSWORD dbname=snort host=localhost sensor name=sensor01 |
Save and exit the file.
If there's multiple users on your system, you might want to prevent other users from having acces to the Barnyard2 configuration file, since the database's password is in there:
chmod o-r /etc/snort/barnyard2.conf |
Now start the Snort daemon we created.
systemctl start Snort |
You should now see snort.u2.xxxxxxxxxx (the x's are numbers) files in the /var/log/snort directory. These files are the binary alerts created by Snort, Barnyard will read and process these.
We can now run Barnyard with the following command:
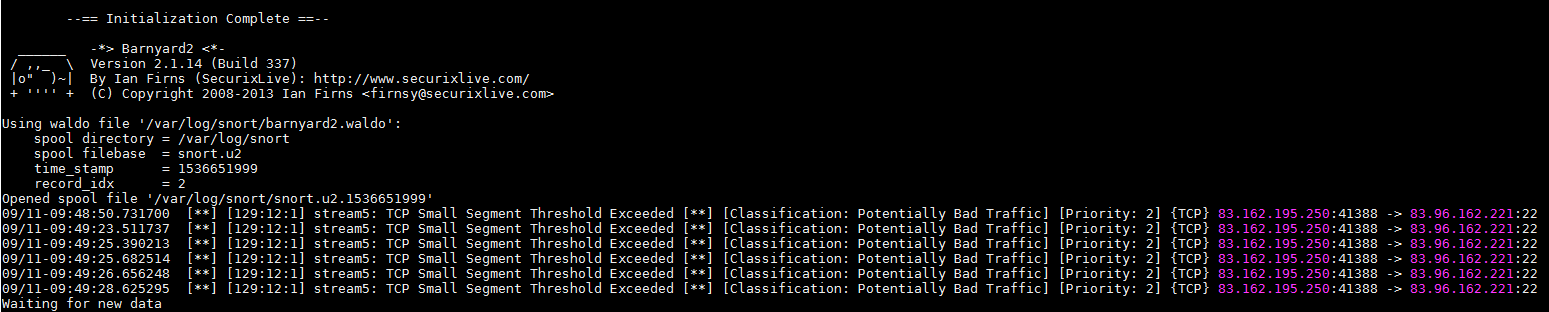
barnyard2 -c /etc/snort/barnyard2.conf -d /var/log/snort -f snort.u2 -w /var/log/snort/barnyard2.waldo -n |
The -n flag indicates Barnyard will only read new Snort.logs.ls
Your output should look like this:
Note that you might not have any records in your Snort.u2 files yet.
You can stop Barnyard 2 from running by pressing ctrl+c.
Barnyard will now write to the database, and you should see records are created in the MySQL database.
Next, we will create a script we can use to run Barnyard at boot-time. This way you will not have to manually keep telling Barnyard whenever you want new Snort logs analysed.
Create a the new script using the following command:
nano /etc/init.d/runbarnyard2 |
Add the following code to the script:
#!/bin/sh case $1 in start) echo "Starting Barnyard2" sudo bash -c "barnyard2 -D -c /etc/snort/barnyard2.conf -d /var/log/snort -f snort.u2 -w /var/log/snort/barnyard2.waldo -n" echo 'Barnyard2 started.' ;; stop) echo "Stopping Barnyard2" sudo killall barnyard2 echo 'Barnyard2 stopped.' ;; restart) $0 stop sleep 4 $0 start ;; *) echo "usage: $0 (start|stop|restart)" ;; esac exit 0 |
The following command will make the script executable:
chmod 700 /etc/init.d/runbarnyard2 |
You can now run, stop or restart Barnyard 2 with the following command:
/etc/init.d/runbarnyard2 start/stop/restart |
Congratulations, you've now set up Snort with Barnyard 2!

Comments are turned off.